
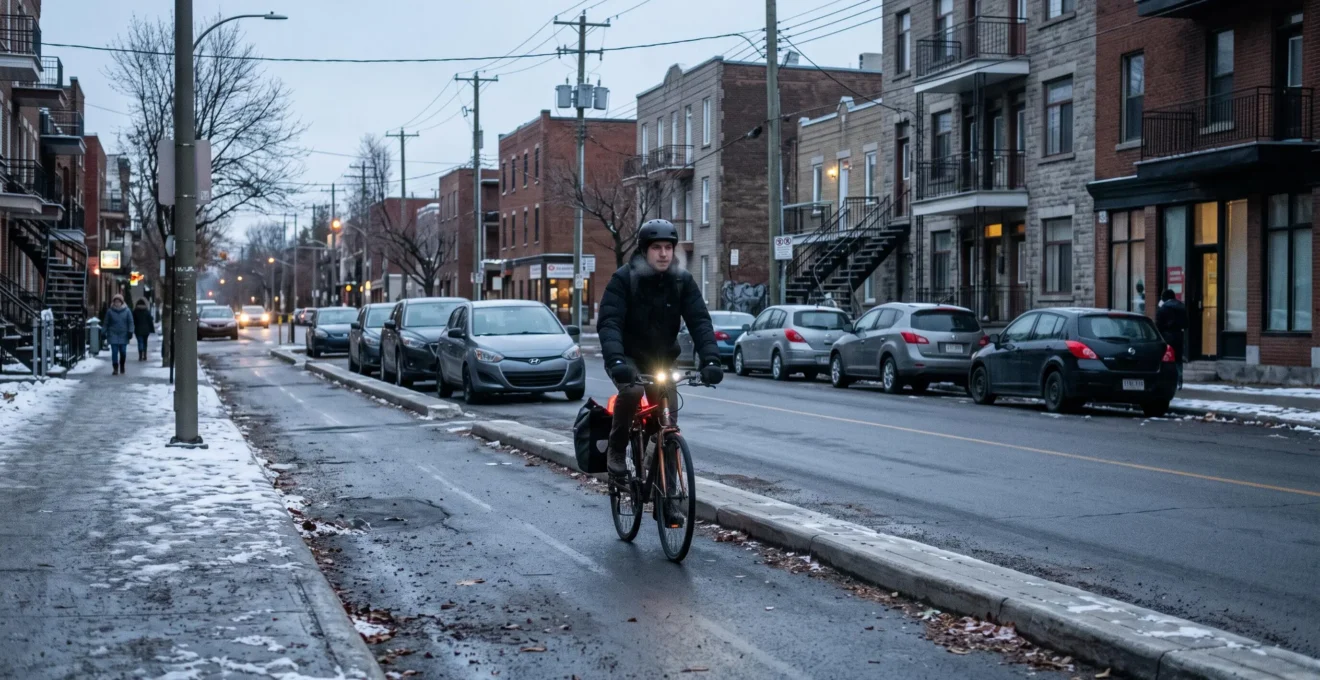
Replacing 20 minutes of daily motor vehicle travel with walking or cycling can lighten your household transportation budget. However, saving 150 $CAD per month is not an automatic outcome: it depends entirely on the specific trips replaced, the operating expenses eliminated, and your capacity to maintain the routine over time.
In a Canadian city, active transportation involves far more than measuring distance. Commuters must navigate vehicular traffic, parking fees, short winter daylight, sub-zero cold, and packed snow or ice. The goal is rarely giving up your car overnight, but identifying regular short trips where active mobility serves as a dependable alternative.
A progressive approach allows you to test the waters without immediately buying an expensive bicycle or committing to grueling winter commutes. The objective is establishing a sustainable routine that cuts spending, integrates smoothly into your daily schedule, and remains enjoyable enough to maintain.
Active Transportation: Key Economic Takeaways
- Saving $150 CAD per month is conditional: it requires genuinely displacing fuel, paid parking, transit passes, or vehicle ownership overhead.
- 20 minutes a day is enough to start: begin by replacing short, recurring errand trips before expanding to daily commutes.
- Safety and weather dictate long-term success: a low-stress route and a realistic winter transit backup are far more effective than an all-or-nothing daily commitment.
- Why your car costs roughly $12 CAD a day just “existing” in the city
- How to start utility cycling in 14 days without quitting at the first -5°C frost
- Walking, standard bicycle, or e-bike: Which choice is realistic for a 6 km commute?
- The beginner mistake: Choosing the shortest route and ending up on a dangerous arterial
- When to invest in winter tires and lights to prevent accidents in November
- Why your “dining out + transit” budget climbs when you live downtown
- How to verify whether a bike lane is genuinely “protected” or merely painted asphalt
- Why a protected bike lane can reduce collisions along an urban arterial
Why your car costs roughly $12 CAD a day just “existing” in the city
A vehicle incurs ongoing expenses even when it sits parked: auto insurance, vehicle registration, capital depreciation, and residential parking permits. The figure of 12 $CAD per day illustrates this fixed carrying cost, though it is not a standardized universal rate. To determine your actual daily ownership overhead, calculate your fixed annual carrying costs separately from per-kilometer operating expenses.
Many drivers view gasoline as their primary vehicle expense. Yet filling the gas tank less often does not lower your insurance premium or halt the vehicle’s monthly depreciation. Even an automobile driven only a few times a week exerts a steady, unavoidable drag on the household budget.
The CAA‘s driving costs calculator illustrates this distinction. In its scenario modeling a 2025 Nissan Sentra in Ontario, it calculates an estimated annual carrying cost of $4,549.61 CAD, with $1,506.11 CAD allocated to fuel alongside modeled depreciation and scheduled maintenance. These figures reflect a specific vehicle class and parameters: they do not represent a Canadian national average or the static cost of an unmoving car.
To calculate your own baseline, tally the fixed annual costs of vehicle ownership that persist even if you never turn the key. Divide that sum by 365. Track variable fuel, tire wear, and mileage-based servicing separately to avoid double-counting expenses.
Case Study: Understanding the $12 CAD Daily Baseline
In an illustrative model, a vehicle owner carries $4,380 CAD per year in fixed overhead (comprehensive insurance, registration, parking stall, and depreciation). That amounts to $12 CAD per day, even if the vehicle never leaves the driveway.
By replacing a few weekly errands with cycling, they save only the marginal fuel and parking fees. However, if active transportation enables the household to eliminate the vehicle entirely—or downsize from two cars to one—they eliminate that $12 CAD daily fixed baseline as well. This structural difference explains why household savings vary so widely.
Paid workplace parking, regional insurance rates, and residential parking permits alter outcomes across provinces. A commuter who avoids a daily $15 CAD parking fee captures immediate savings, whereas someone with free workplace parking and an existing car sees far more modest cash-flow gains.
Walking or cycling for 20 minutes a day represents a practical first step toward reducing driving, rather than a guaranteed $150 CAD monthly windfall. The next priority is making the routine easy enough to maintain consistently.
How to start utility cycling in 14 days without quitting at the first -5°C frost
To transition to utility cycling within 14 days, start with low-stress, unhurried trips before integrating daily commutes. In cold weather, preparation matters far more than willpower: wind-resistant layers, reliable bike lights, a pre-scouted route, and a transit backup plan. At -5°C, road surface conditions dictate safety far more than the temperature itself.
Spend the first seven days getting comfortable with your bicycle and your local street network. Choose a short errand, a quiet neighborhood side street, or a trial run along part of your work commute. Test the route during daylight under clear weather, noting difficult intersections, road hazards, and secure bike racks.
At the end of week one, evaluate three checkpoints: Did the route feel safe? Did your gear perform reliably? Do you feel motivated to repeat the trip? If the answer is negative, adjust the route or shorten the distance before pushing further.
During the second week, begin replacing practical trips: picking up small groceries, cycling to a rapid transit station, or commuting to work on days with favorable forecasts. Build in a schedule buffer so minor delays do not create morning stress.
To begin, prioritize a mechanically sound bicycle, tuned brakes, a certified helmet, a dependable U-lock, and statutory visibility lights. Expensive technical apparel, specialized panniers, and winter studded tires can wait until your riding habit is established.
When the temperature drops to -5°C, evaluate wind chill, black ice, frozen slush, and roadway clearing. A dry, cold asphalt path presents minimal difficulty compared to an unplowed lane hiding patches of ice. If surface traction is questionable or conditions feel unsafe, take public transit instead.
Your 14-Day Starter Checklist: Five Actions
- Select two short destination routes: Log destination addresses, verified distances, and purposes in your phone.
- Perform a mechanical safety check: Verify brakes, tire pressures, front/rear lights, helmet fit, and your lock mechanism.
- Test the route without time pressure: Ride the corridor on a weekend, noting complex turn lanes and blind spots.
- Replace selected trips in week two: Track each completed ride alongside parking fees or transit fares avoided.
- Conduct a Day-14 review: Decide whether to maintain your route, alter the street alignment, or adopt a hybrid transit-cycling model.
An unsuccessful first ride does not mean cycling is wrong for you. An exhausting hill climb, an intimidating intersection, or inadequate gloves are specific problems with practical solutions.
Once initial riding habits take root, selecting the right equipment becomes critical, especially when your workplace is several kilometers away.
Walking, standard bicycle, or e-bike: Which choice is realistic for a 6 km commute?
For a 6 km daily work commute, a conventional bicycle is often an efficient option, while an electric-assist bicycle (e-bike) helps flatten steep hills and head winds. Walking is viable, but demands substantial time. The best choice balances door-to-door transit time, physical exertion, workplace end-of-trip amenities, and the specific vehicle expenses displaced.
Six kilometers as the crow flies rarely equals six kilometers on the pavement. Rail corridors, highway interchanges, or river crossings often force detours. Measure your actual low-stress cycling distance before comparing travel modes.
Consider daily logistics: perspiration, the ability to shower or change clothing at work, secure indoor bicycle parking, and head winds. An e-bike reduces physical exertion on steep climbs, but its higher purchase price, battery charging, and theft risk must be factored in.
| Evaluation Dimension | Walking | Conventional Bicycle | Electric Bicycle (E-bike) |
|---|---|---|---|
| Commute Duration | 60 to 90 minutes; highly predictable | 20 to 25 minutes; route-dependent | 18 to 22 minutes; consistent in winds/hills |
| Physical Exertion | Moderate, steady endurance | Variable based on grades and pace | Adjustable pedal-assist limits perspiration |
| Capital Investment | Minimal; sturdy footwear | Moderate; bike, lock, and basic gear | Higher; e-bike, battery care, and secure locking |
| Practical Friction | Time commitment and bad weather | Route safety, perspiration, and secure parking | Battery charging, bike weight, and theft exposure |
| Winter Viability | Depends on sidewalk snow plowing | Depends on cycle track snow clearing and ice | Same winter road limits, plus cold battery range loss |
A hybrid commuting model is often more sustainable than trying to cycle through every weather extreme. You can ride on fair-weather days, take public transit during freezing rain or heavy snowfall, and drive only when carrying cargo.
To compare costs, calculate expenses saved per trip: marginal gasoline, avoided commercial parking fees, or unused transit fares. Subtract bicycle depreciation and maintenance.
An e-bike’s financial payback period can be estimated by dividing its net purchase price by the verified monthly transportation savings it generates. This calculation holds true if operating savings are positive and stable, factoring in annual maintenance and eventual battery replacement.
Your chosen mode will only succeed if the physical route feels comfortable to ride. Shaving three minutes off your commute by riding on an intimidating arterial road is rarely a sound trade-off.
The beginner mistake: Choosing the shortest route and ending up on a dangerous arterial
A cycling route should never be chosen on distance alone. Automated mapping apps frequently suggest high-speed commercial arterials that feel stressful, featuring close-passing vehicles, complex multi-lane turns, or door-zone bike lanes. For a new commuter, detouring several blocks through traffic-calmed residential streets or separated pathways provides a far safer, lower-stress ride.
Consider two parallel routes to work: Route A follows a major commercial thoroughfare with fast vehicle traffic. Route B follows residential streets and connects to a protected cycle track. Although Route B adds several minutes, it removes the stress of riding alongside heavy traffic.
Actual safety and perceived comfort are not always identical. A quiet residential street may include a blind, uncontrolled intersection, while a busier street may offer signalized bike crossings. Identify the specific points where cycling paths and turning vehicles cross.
Before commuting to work by bike, scout the route on foot, via municipal bike network maps, or from public transit. Spot right-hook risk zones, commercial loading docks, construction detours, and gaps in bike lanes. Then test-ride the route on a quiet weekend morning.
Do not forget the evening commute. A street that is quiet at 7:30 a.m. can become congested with rush-hour traffic by 5:00 p.m., and an unlit summer shortcut through a park may feel unsafe after dark in autumn.
Detours introduce a minor time cost. To compare driving and cycling objectively, calculate total door-to-door times: walking to the parking garage, clearing traffic, finding a parking space, and walking to the office. Driving often loses its speed advantage downtown once parking logistics are included.
Once you dial in a comfortable route, establish what seasons you will ride and what safety gear warrants immediate investment.
When to invest in winter tires and lights to prevent accidents in November
In Canada, bicycle lighting and visibility must be checked well before evening commutes occur in the dark, typically by mid-autumn. Specialized winter cycling tires become relevant when you plan to ride over cold, snowy, or icy asphalt. However, safety gear alone cannot prevent collisions: weather conditions, municipal snow-clearing standards, and personal caution must guide every ride.
By November, depending on your latitude and shift hours, evening commutes occur entirely after sunset. Cold rain, wet leaves, and early flurries reduce motorist visibility and increase stopping distances.
Your immediate priority is equipping your bicycle with statutory front and rear lights, maintaining responsive brake pads, and wearing high-visibility outer layers. Specific equipment rules vary by province.
In Quebec, cycling visibility and equipment rules from the SAAQ mandate a white front light and a red rear reflector or light when riding after dark. The SAAQ also notes that helmets are mandatory for e-bike riders. These requirements must be verified against local provincial highway safety codes.
Winter tires represent a separate technical investment. Their value depends on the road surfaces you encounter: hard-packed snow, frozen asphalt, black ice, or reliably plowed pavement. Carbide-studded tires provide mechanical grip on ice, but require careful riding and cannot overcome reckless speeds.
Selective winter cycling is a practical strategy: ride when protected cycle tracks are plowed, and switch to transit or walking during active snowstorms or freezing rain. This preserves travel savings without forcing you onto treacherous roads.
Winter Cycling Guidance: SAAQ Safety Recommendations
In its published winter cycling advice, the Société de l’assurance automobile du Québec highlights the hazards of black ice, metal bridge expansion joints, and sightlines blocked by roadside snowbanks.
The agency advises cyclists to avoid abrupt braking, keep clear of active snow-clearing plows, and clean bike drivetrains regularly to combat the corrosive effects of winter road salt and slush. These guidelines reflect Quebec conditions and apply across Canadian winter cycling environments.
Before purchasing cold-weather accessories, evaluate how many winter days you will realistically ride. Compare the cost of studded tires, pogies, and winter tune-ups against the driving or transit expenses you will displace. Upgrading your current commuter bike incrementally is often far more cost-effective than buying specialized winter gear all at once.
Maintaining active transportation habits depends on these practical choices and your broader household budget. Living close to amenities does not automatically mean spending less.
Why your “dining out + transit” budget climbs when you live downtown
Living downtown eliminates the need for car travel, but increases exposure to daily retail spending. Restaurants, cafés, specialty markets, and entertainment are right outside your front door. Household spending can easily climb if transportation savings are redirected toward discretionary dining. A budget increase is not automatic: it depends on household habits, rent, and actual transit costs avoided.
Walkability delivers obvious financial benefits when you walk to the grocery store, work, and community services, eliminating gas, parking, and transit fares. However, that density also creates continuous temptations for impulse spending.
Gasoline savings can quietly shift into takeout coffees, restaurant lunches, and evening socializing. Your transportation line item drops, but your monthly bank balance remains unchanged.
To monitor this dynamic, track two distinct budget categories over several weeks:
- Direct Transportation: Gas, parking meters, transit passes, rideshares, and vehicle maintenance.
- Walkable Discretionary Spending: Restaurants, cafés, quick retail stops, and entertainment.
Distinguish fixed vehicle ownership overhead and prepaid transit passes from marginal savings. Retaining an unlimited monthly transit pass yields zero savings if you walk to work only a couple of days a week.
Downtown living also saves personal time. When destinations are close and parking is difficult, walking or cycling is often faster than driving. However, compare specific routes: a central home does not guarantee a short commute to every workplace, nor does it guarantee low rent.
If you are planning a move, evaluate rent, transportation expenses, commute times, and access to services together. A home situated slightly further out along a direct, protected cycling corridor can sometimes offer lower total living costs than an expensive downtown flat. Conversely, a cheap apartment requiring two commuter cars can quickly erase housing savings.
Active transportation delivers sustainable savings only when paired with mindful spending and safe cycling corridors. Infrastructure quality remains a deciding factor.
How to verify whether a bike lane is genuinely “protected” or merely painted asphalt
A genuinely protected cycle track features a continuous physical barrier separating cyclists from motor vehicle traffic—such as precast concrete curbs, bollards, planters, or raised grade separation. A painted white line provides visual demarcation, but zero physical protection against vehicle encroachment. Assessing a bikeway also requires auditing intersection treatments, barrier continuity, and winter maintenance.
The term “bike lane” encompasses vastly different engineering designs. An on-street painted lane leaves cyclists exposed to double-parked delivery vans, doorings, and turning cars. A cycle track separated by concrete curbs establishes a protected physical right-of-way. Tracks may be street-level with concrete barriers or raised to sidewalk height.
However, the presence of a barrier on one block does not guarantee a safe corridor. A protected lane that abruptly ends before a complex intersection, routes through commercial driveways, or runs inside the door zone of parked cars leaves riders vulnerable.
When auditing a route, look for five design elements:
- Physical Separation: Is there a solid vertical barrier separating bikes from motor vehicles?
- Intersection Geometry: Are vehicle turn lanes, bike boxes, and crossing paths clearly marked?
- Route Continuity: Does the physical protection drop unexpectedly along key stretches?
- Door-Zone Buffer: Is there a painted buffer keeping the bike track outside the reach of opening car doors?
- Winter Clearing: Can municipal plows access the lane to clear snow and treat ice?
Intersections demand the closest attention. Even along corridors with continuous concrete barriers, turning motor vehicles cross the bike track at intersections. Spotting these potential turn conflicts is essential rather than assuming a separated lane is safe along its entire length.
Review municipal cycling network maps and test the route in person. Open data platforms map infrastructure types, but cannot capture recent surface pavement deterioration or temporary construction blockages.
For winter riding, verify whether the route is prioritized for municipal snow clearing. Service levels vary across municipal wards and can shift throughout the winter season.
This inspection reveals why barrier design shapes safety, and why published research on cycle tracks must be evaluated alongside specific infrastructure types.
Key Considerations When Choosing Your Cycling Route
- A physical barrier is a major safety asset, but barrier continuity and intersection design dictate overall route safety.
- Safety findings from one city cannot be assumed to apply identically across a different street network.
- The best cycling route is the one that combines physical protection, direct access to your destination, and dependable winter maintenance.
Why a protected bike lane can reduce collisions along an urban arterial
A protected bike lane reduces conflicts between cyclists and motor vehicles by physically separating their paths along the roadway. This separation eliminates close-passing maneuvers and sideswipes along mid-block sections. Academic research conducted in Toronto documented a reduction in collision rates adjusted for cycling volume following the installation of separated lanes, though safety gains depend on design and cannot be assumed for every street.
On an unprotected street, cyclists share space with fast motor vehicles, leaving them vulnerable to overtaking maneuvers, opening doors, and sudden lane merges. A physical concrete curb eliminates many of these friction points along mid-block stretches. It does not, however, remove conflict points at intersections or commercial driveways.
A study on collisions before and after the installation of bicycle infrastructure in Toronto, published in 2020 in Accident Analysis & Prevention, examined police-reported collision data spanning 2000 to 2016.
-38%
Observed reduction in the rate of collisions between cyclists and motor vehicles per cyclist-month on studied Toronto streets following the installation of separated cycle tracks, adjusted for cycling volume. The adjusted rate ratio was 0.62 (95% CI: 0.44–0.89). This represents a localized observational finding rather than an automatic decrease in raw collision counts.
Study published in 2020 in Accident Analysis & Prevention, using Toronto data from 2000 to 2016.
The researchers also documented a 2.57-fold increase in cycling ridership along the upgraded corridors. The raw count of collisions rose alongside that surging ridership. That is why the 38% reduction applies to the volume-adjusted collision rate per cyclist-month and should not be cited as a drop in raw collision totals.
Another crucial finding: 75% of collisions between cyclists and motor vehicles along these corridors occurred at intersections. Physical mid-block barriers do not replace the need for protected intersection geometry, dedicated turning phases, and clear sightlines where traffic turns across the bike lane.
This research provides evidence in favor of physically separated cycle tracks, while demonstrating that safety performance varies by design. Lane width, intersection management, sightlines, user compliance, and maintenance all dictate performance. A poorly designed track can leave dangerous conflict points unresolved or introduce new ones.
For your household budget, route safety has a direct financial impact: when a protected, well-maintained cycling network makes active transportation comfortable, replacing car trips becomes an easy daily habit. Without safe infrastructure, commuters understandably return to driving or public transit when weather or traffic worsens.
Municipal cycling networks continue to expand across Canada. Before altering your daily commute or choosing a new neighborhood, review existing cycling infrastructure alongside approved municipal master plans, distinguishing between completed lanes and unbuilt proposals.
Identify one short errand you currently drive, scout the route on foot or by bike, and track your actual savings over two weeks. That hands-on test will give you empirical data to determine whether saving $150 CAD per month is achievable in your daily routine.
Is it truly possible to save $150 CAD per month by walking 20 minutes a day?
Yes, in specific circumstances, though it is not a universal guarantee. Savings depend on displacing paid transportation costs: daily parking meters, fuel consumption, transit passes, or vehicle ownership overhead. Walking 20 minutes without replacing a paid trip yields zero direct cash savings. Reaching $150 CAD over 20 workdays requires avoiding an average of $7.50 CAD per day in variable driving or transit costs, minus cycling gear expenses.
Must you give up your car entirely for cycling to be financially worthwhile?
No. Replacing selected short trips lowers gasoline consumption and parking fees even while keeping your car. However, auto insurance, registration fees, and baseline depreciation persist. Downsizing to a single-car household or selling a car entirely unlocks far larger financial savings, provided alternative transit is accessible when needed.
How do you maintain an active commute when sidewalks and bike lanes are covered in snow?
Adopt a flexible winter routine. Check municipal snow-clearing reports, surface traction, and forecasts before departing. Walk or cycle when corridors are plowed and salted, and switch to public transit during freezing rain or heavy storms. The objective is reducing driving over the course of the year, rather than taking unnecessary physical risks on treacherous roads.
How should you calculate savings when alternating between walking, cycling, and public transit?
Track your replaced trips and calculate the specific marginal expenses eliminated. Subtract incremental transit fares, bike maintenance, or cold-weather gear. Do not count fixed monthly expenses—such as an unlimited transit pass or insurance premiums—as savings if you continue paying them in full. Tracking trips over several representative weeks reveals your net savings.